This blog has been updated for accuracy, April 2023
Google Analytics has grown to become a powerful web analytics tool for traffic measurement, audience segmentation, e-Commerce tracking, and mobile analytics. With the addition of GA4, that reputation will only continue to grow. There are many situations in which you may want to provide someone “read-only” access to your Google Analytics data, such as collaborating with vendors, partners, consultants, etc.
Here is a step-by-step guide to provide someone with “read-only” access that can be applied to both Google Analytics and GA4.
- Log into your Google Analytics account
- Click the Admin Gear in the bottom left of the screen
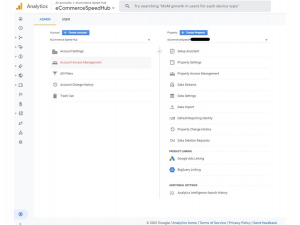
3. Under Account Column, click Account Access Management:
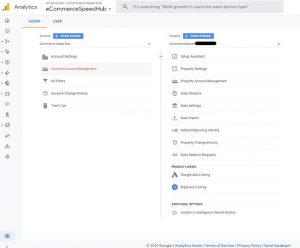
- Click + Plus Sign in the top right corner, then Add users:

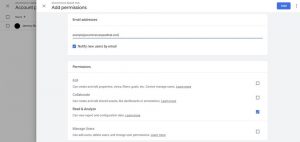
- Enter the email address of the user – the user must have a google account (you don’t need a Gmail to create a Google Account)
- Choose desired permissions for the user, “Read & Analyze” is the Read-Only permission. Also, have the option to toggle whether to notify the user by email
- Click Add in top right corner, you are done!
Love gaining new and helpful data with Google Analytics? Get even more data on your site with an eCommerce Site Performance Snapshot! Try it out for free!